Merchant Solutions
Simplify Payments, Pay Less
IntelliPay’s payment suite simplifies payments and helps reduce overall processing costs. Our admin console makes adding users, features, and payment options easy. While fee-based options, where customers pay processing fees, reduce processing costs!
IntelliPay Payment Processing
Virtual Terminals
Browser based EMV for in-person and over-the-phone payments

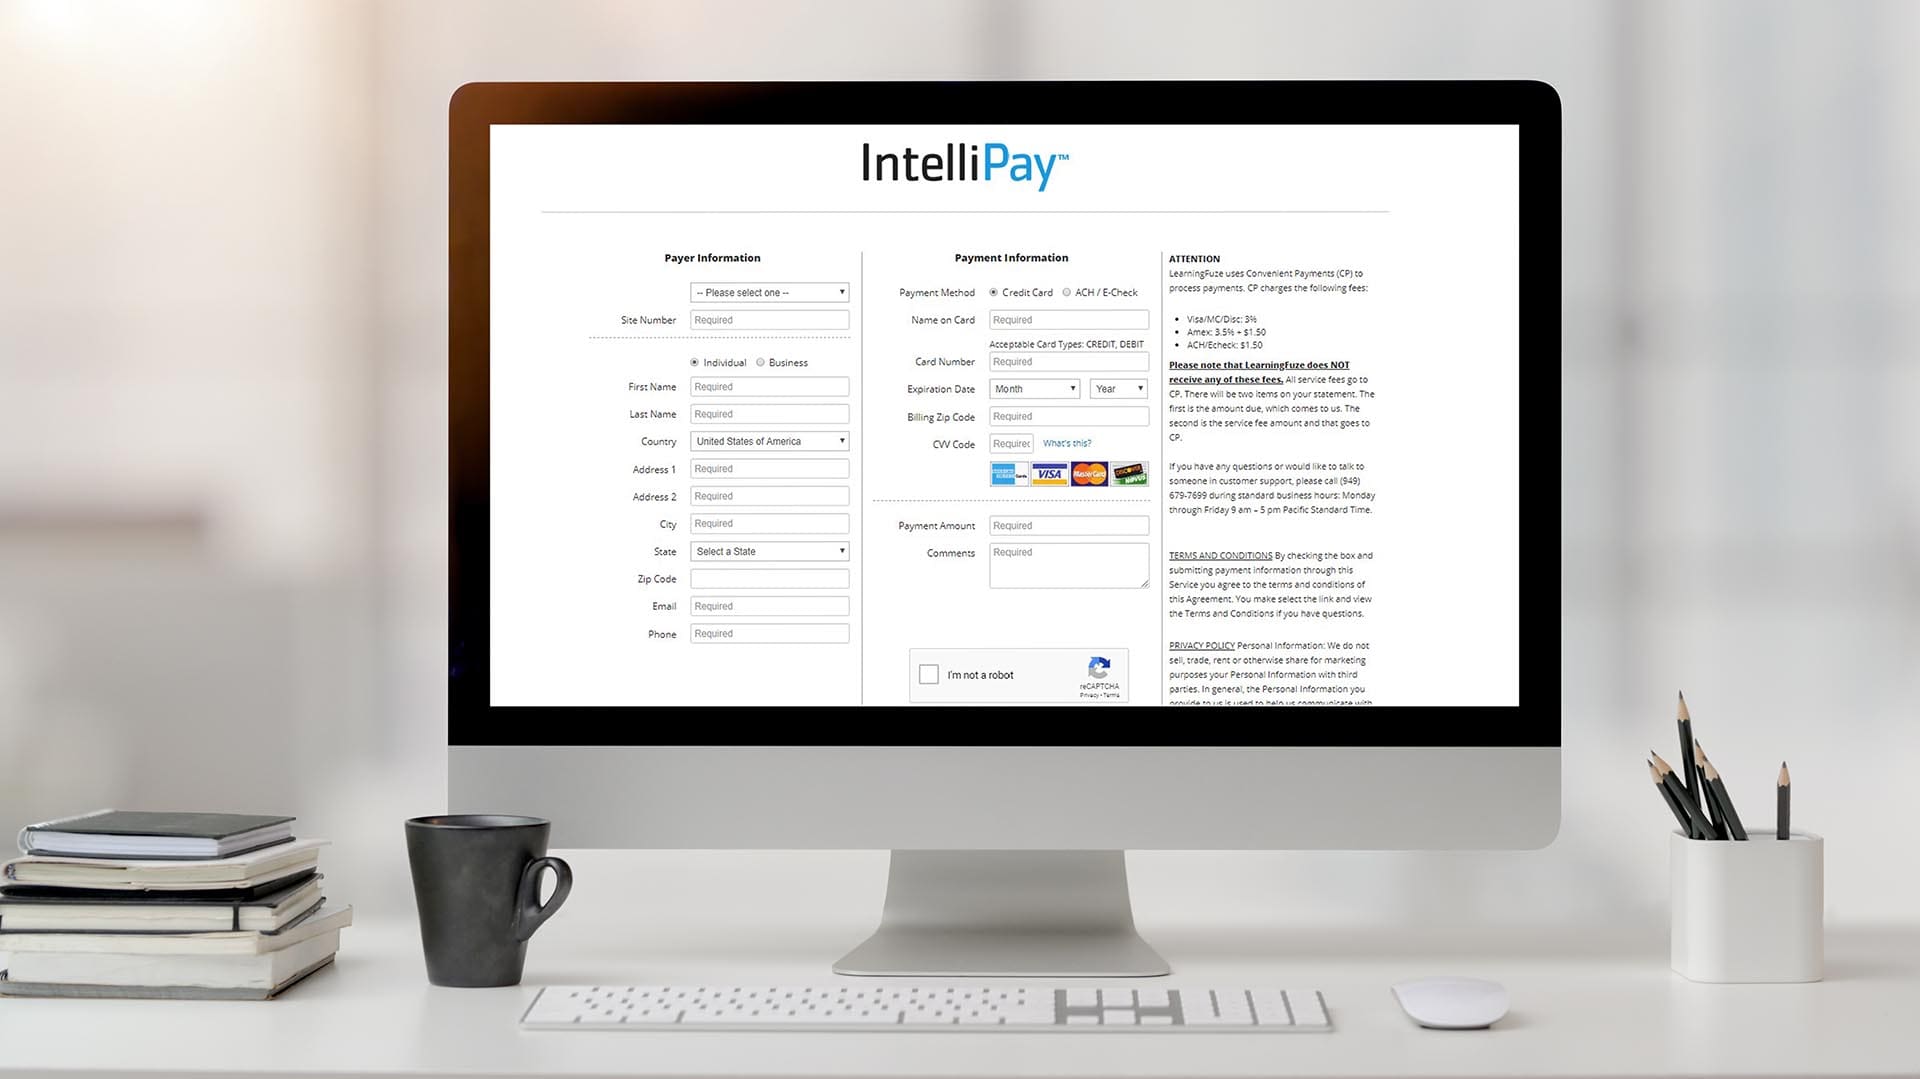
Online Payment Page
Add to any website and customize for secure checkouts and donations
Customer Portals
Cross device compatibility with built-in wallet and multi-invoice payment capabilities
Lightbox Modal
Pop-up modals that allow secure payments from existing invoice pages
Text to Pay/Email Payments
Create and securely send on-demand payment link with custom messages

Mobile App
iOS and Android app makes accepting payments in the wherever you go easy
Batch Processing
Process many transactions and securely upload payment data all at one time
Reduced Cost Options
Add to any website and customize for secure checkouts and donations
Robust Reporting
Detailed reports simplify reconciliations and payment management
Custom Fields
Fields can be customized to the way you do business
Recurring Payments & Auto Pay
Increase efficiency and reduce late payments with automated billing
Safe & Secure
Tokenization, encryption and other secure technologies safeguard sensitive payment data<
Payment APIs
Our development team has created powerful, easy-to-use APIs so you won’t spend months integrating payments into your environment.
Prebuilt integrations
Use integrations for QuickBooks Online, Woo Commerce and Auth.NET emulator to connect third- party shopping carts or CRMs.

Payments Savings
Visa, Mastercard, Amex, and Discover charge mandatory, non-negotiable interchange fees to manage the risk involved in a transaction.
Riskier online transactions completed with rewards credit cards have the highest fees, usually about 2X the cost of debit cards. But there are ways to minimize or eliminate fees and save your margins.
IntelliPay offers:
- Interchange plus pricing
- Auto-filled Level 2 and 3 data
- The customer pays the processing costs (fee-based options)
- No junk fees

Fee-Based Options
Charging a customer a fee for using a high-cost credit card is not illegal or unethical.
Customers choose a rewards card to get the travel perks or cash back at your expense. Which is not fair!
Level the playing field with 100% compliant fee-based options that reduce a merchant’s processing costs.
